
 I have wanted to install a rain barrel at my house for a very, very long time. It would be one way to help reduce flooding in a low area in our yard. Plus we have lots of plants that would love the free water. But, seriously, who has a 55 gallon barrel lying around? I certainly didn’t. I checked lots of options online from the minimal to the beautiful (and pricey). I just wasn’t sure what to get. So like many other things in life, the rain barrel dream was put on the back burner while my busy life continued.
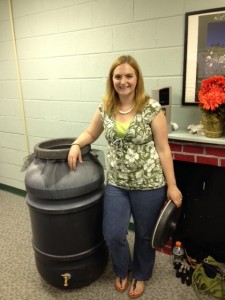
And then, when I wasn’t even thinking about rain barrels, everything fell into place! I learned about a low cost rain barrel workshop hosted by Hampton Master Gardens and Hampton Clean City Commission on a weekend my husband was (finally) off work. So I signed us up and a few days later we were traveling home with a 55 gallon rain barrel in the back of our Toyota Corolla. (Yes, it did fit in there!)
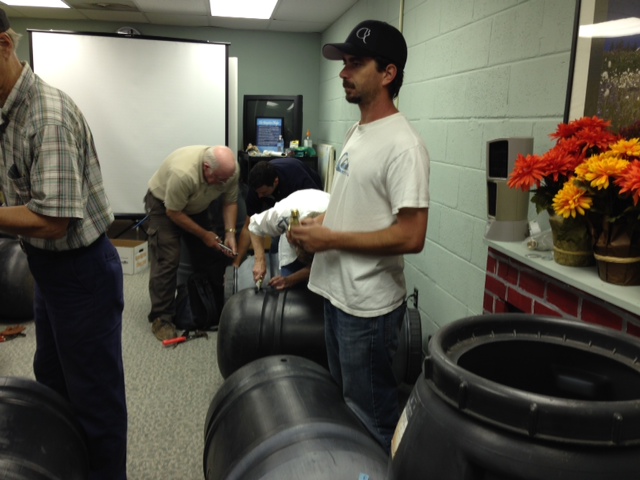 The two hour workshop provided a great overview of water quality problems and what we could all do to help clean up local waterways. It also included the supplies and assistance we needed to make our very own rain barrel. The barrels were pre-drilled for the faucet and overflow connector so all we had to do was attach fixtures, caulk and away we went!
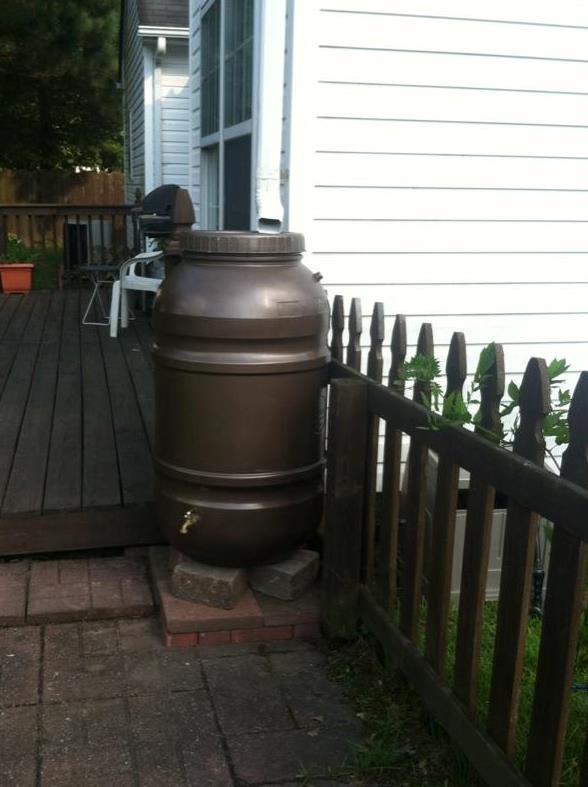
The next day we stopped by the hardware store and picked up two cans of all surface spray paint, bricks and some downspout elbows. We stacked up the bricks and placed the rain barrel on top so our watering can will fit underneath. Next, we measured the gutter and made a cut in just the right place. And when I say we did this…I definitely just mean my husband did it. The downspout elbows finished off the project by helping future rainfall find its way into our rain barrel.
 So here it is! The finished product that will reduce flooding in our swampy yard, provide a source of free water for outdoor uses and help our home send less water down the storm drain and into local waterways. Find out how you can make your own rain barrel or if you’re like me and need some outside help, find an upcoming rain barrel workshop near you!
Now let’s see your rain barrels, Hampton Roads! Share a picture of your rain barrel with us on Facebook or Twitter and inspire others to get their own.